Scenario:
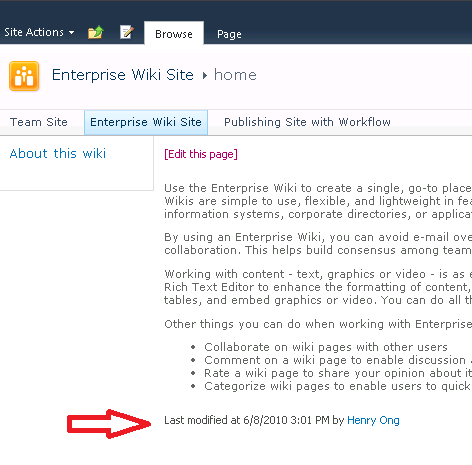
You’re working with the Enterprise Wiki Site Template and you don’t really like where the “Last modified…” information is located (above the content). You want to move that information to the bottom of the page.
Option 1: Modify the “EnterpriseWiki.aspx” Page Layout directly.
Option 2: Create a new Page Layout based on the original one and then modify that one.

We’ll go ahead and go with Option 2 since we don’t want to modify the out of the box template just in case we need it later on.
How To:
Step 1
Navigate to the top level site of the Site Collection > Site Actions > Site Settings > Master pages (Under the Galleries section). Then switch over to the Documents tab in the Ribbon and then click New > Page Layout.

Step 2
Select the Enterprise Wiki Page Content Type to associate with, give it a URL and Title. Note that there’s also a link on this page to create a new Content Type. You might be interested in doing this if you wanted to say, add more editing fields or metadata properties to the layout. For example if you wanted to add another Managed Metadata column to capture folksonomy aside from the already included “Wiki Categories” Managed Metadata column.

Step 3
SharePoint Designer time! Hover over your newly created Page Layout and “Edit in Microsoft SharePoint Designer.”

Step 4
Now you can choose to build your page manually by dragging your SharePoint Controls onto the page and laying them out as you’d like…

… Or you can copy and paste the OOB Enterprise Wiki Page Layout. I think I’ll do that. ![]()
Step 5
Alright, so you’ve copied the contents of the EnterpriseWiki.aspx Page Layout and now it’s time for some customizing. I found the control I want to move, so I’ll simply do a copy or cut/paste to the new spot.

Step 6
Check-in, publish, and approve the new Page Layout. Side note: I like to add the Check-In/Check-Out/Discard or Undo-Checkout buttons to all of my Office Applications’ Quick Access Toolbars for convenience.
Step 7
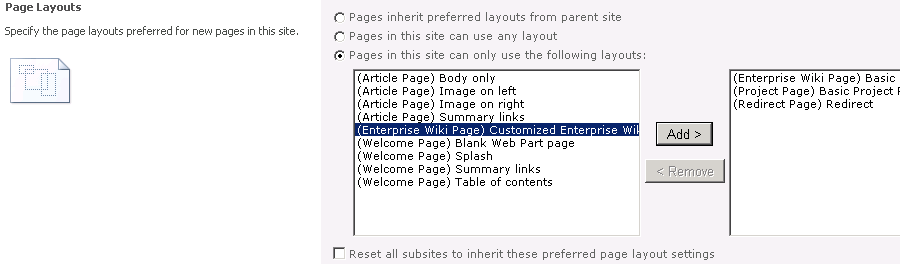
Almost there! Navigate to your publishing site, in this case the Enterprise Wiki Site, then go to Site Actions > Site Settings > Page layouts and site templates (Under Look and Feel). Here you’ll be able to make the new Page Layout available for use within the site.
Step 8
Go back to your site and edit the page that you’d like to change the layout for. On the Page tab of the Ribbon, click on Page Layout and select your custom Page Layout.

Et voila! You just created a custom Page Layout using SharePoint Designer 2010, re-arranged a SharePoint control and managed to plan for the future by not modifying the out of the box template. That was a really simple example but I hope it helped to give you some ideas on how else you can customize Page Layouts within SharePoint 2010!
Hi,
ReplyDeleteIam Yogesh Gaikwad working as UI Designer have one question iam using SharePoint 2010 an i want to create page layout using field editor